GIFs are awesome. They’re relatable, grab a reader’s attention, and can give your audience that much-needed giggle to brighten up their day. But how to remove the background from a GIF? We’ve got you.
We’re going to show you how you can do that in just a few seconds right here using Unscreen. If you don’t have a GIF just yet, let’s dive into where you can find royalty-free GIFs and how to create your own.
Where to find royalty-free GIFs
Want to use a GIF in your marketing material? It’s best to make sure it’s royalty-free — that way, you’re protecting both yourself and your company.
Royalty-free means that you can use the image commercially and free without accrediting the creator. You can find royalty-free GIFs on Giphy.
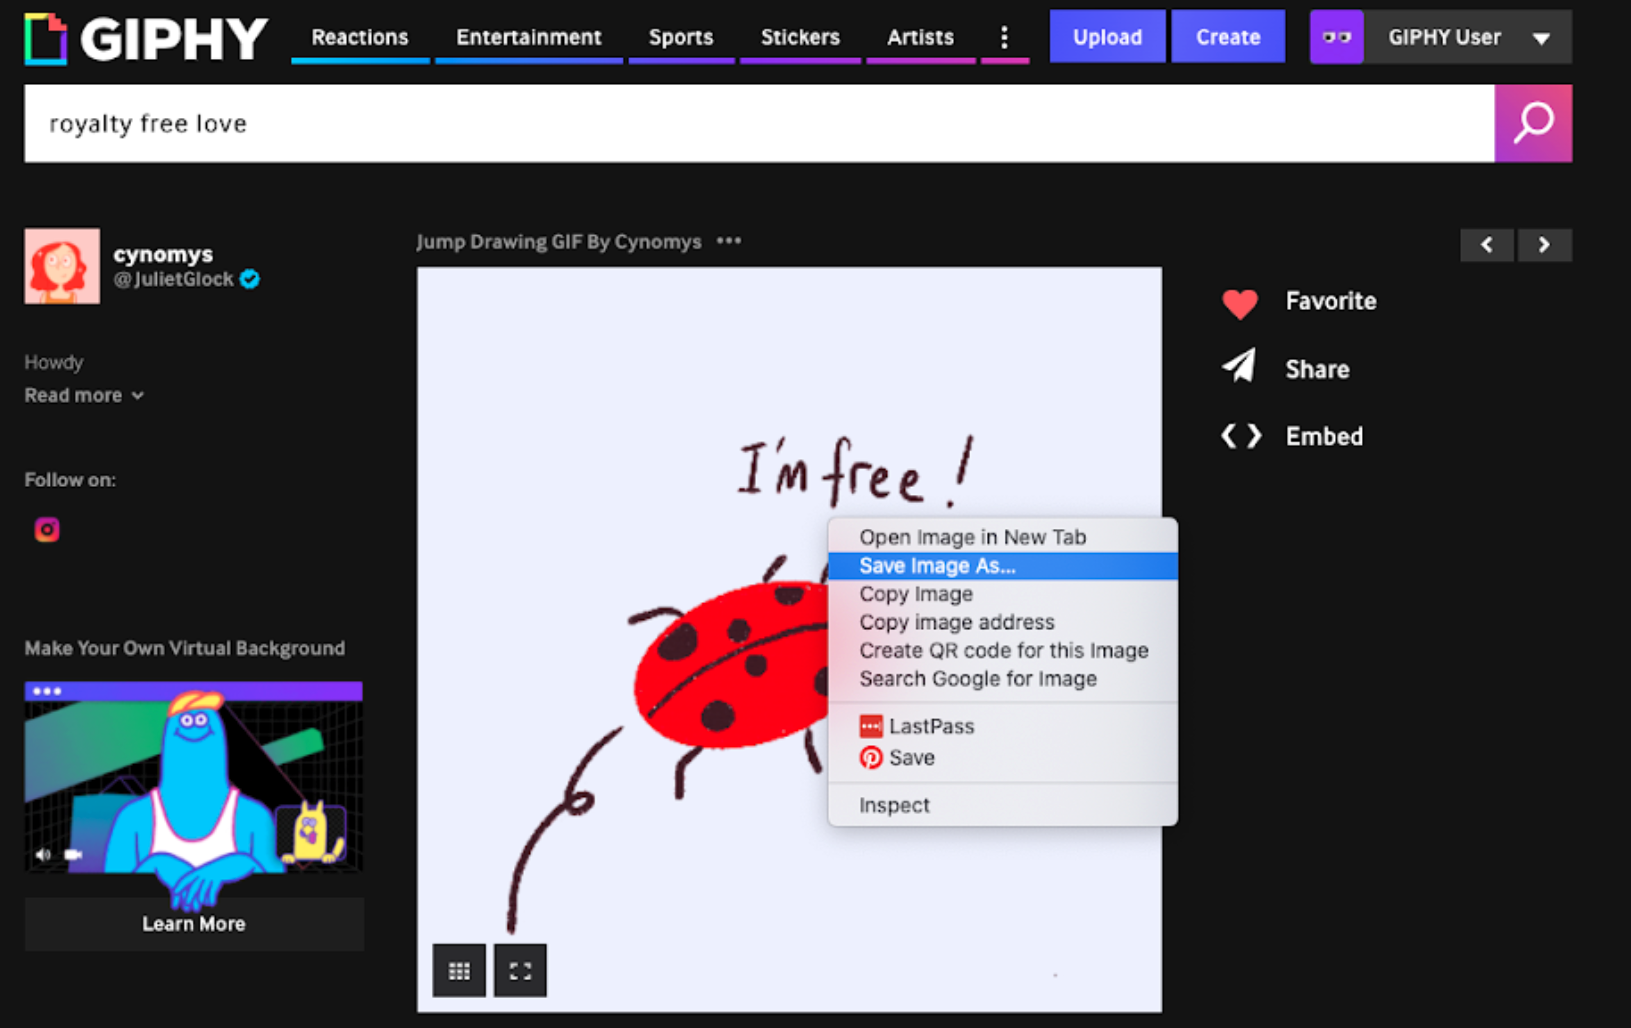
We went ahead and found a cute little ladybug one to guide you through changing the background of a GIF.
You can save the GIF on Giphy by right-clicking on the GIF and selecting > ‘Save Image As…’
How to remove the background from a GIF image online on Unscreen
Once you’ve saved your GIF, it’s time to figure out how to remove the background from a GIF. Removing the background means you can replace it with another color, graphic, or video — or you can even add the GIF to a slide deck, and the background will be undisturbed.
The quickest way to remove a background from a GIF is to hop on over to Unscreen.
How to remove a white background from a GIF
1. Open up Unscreen.
2. Drag and drop your GIF onto the screen. Like this:

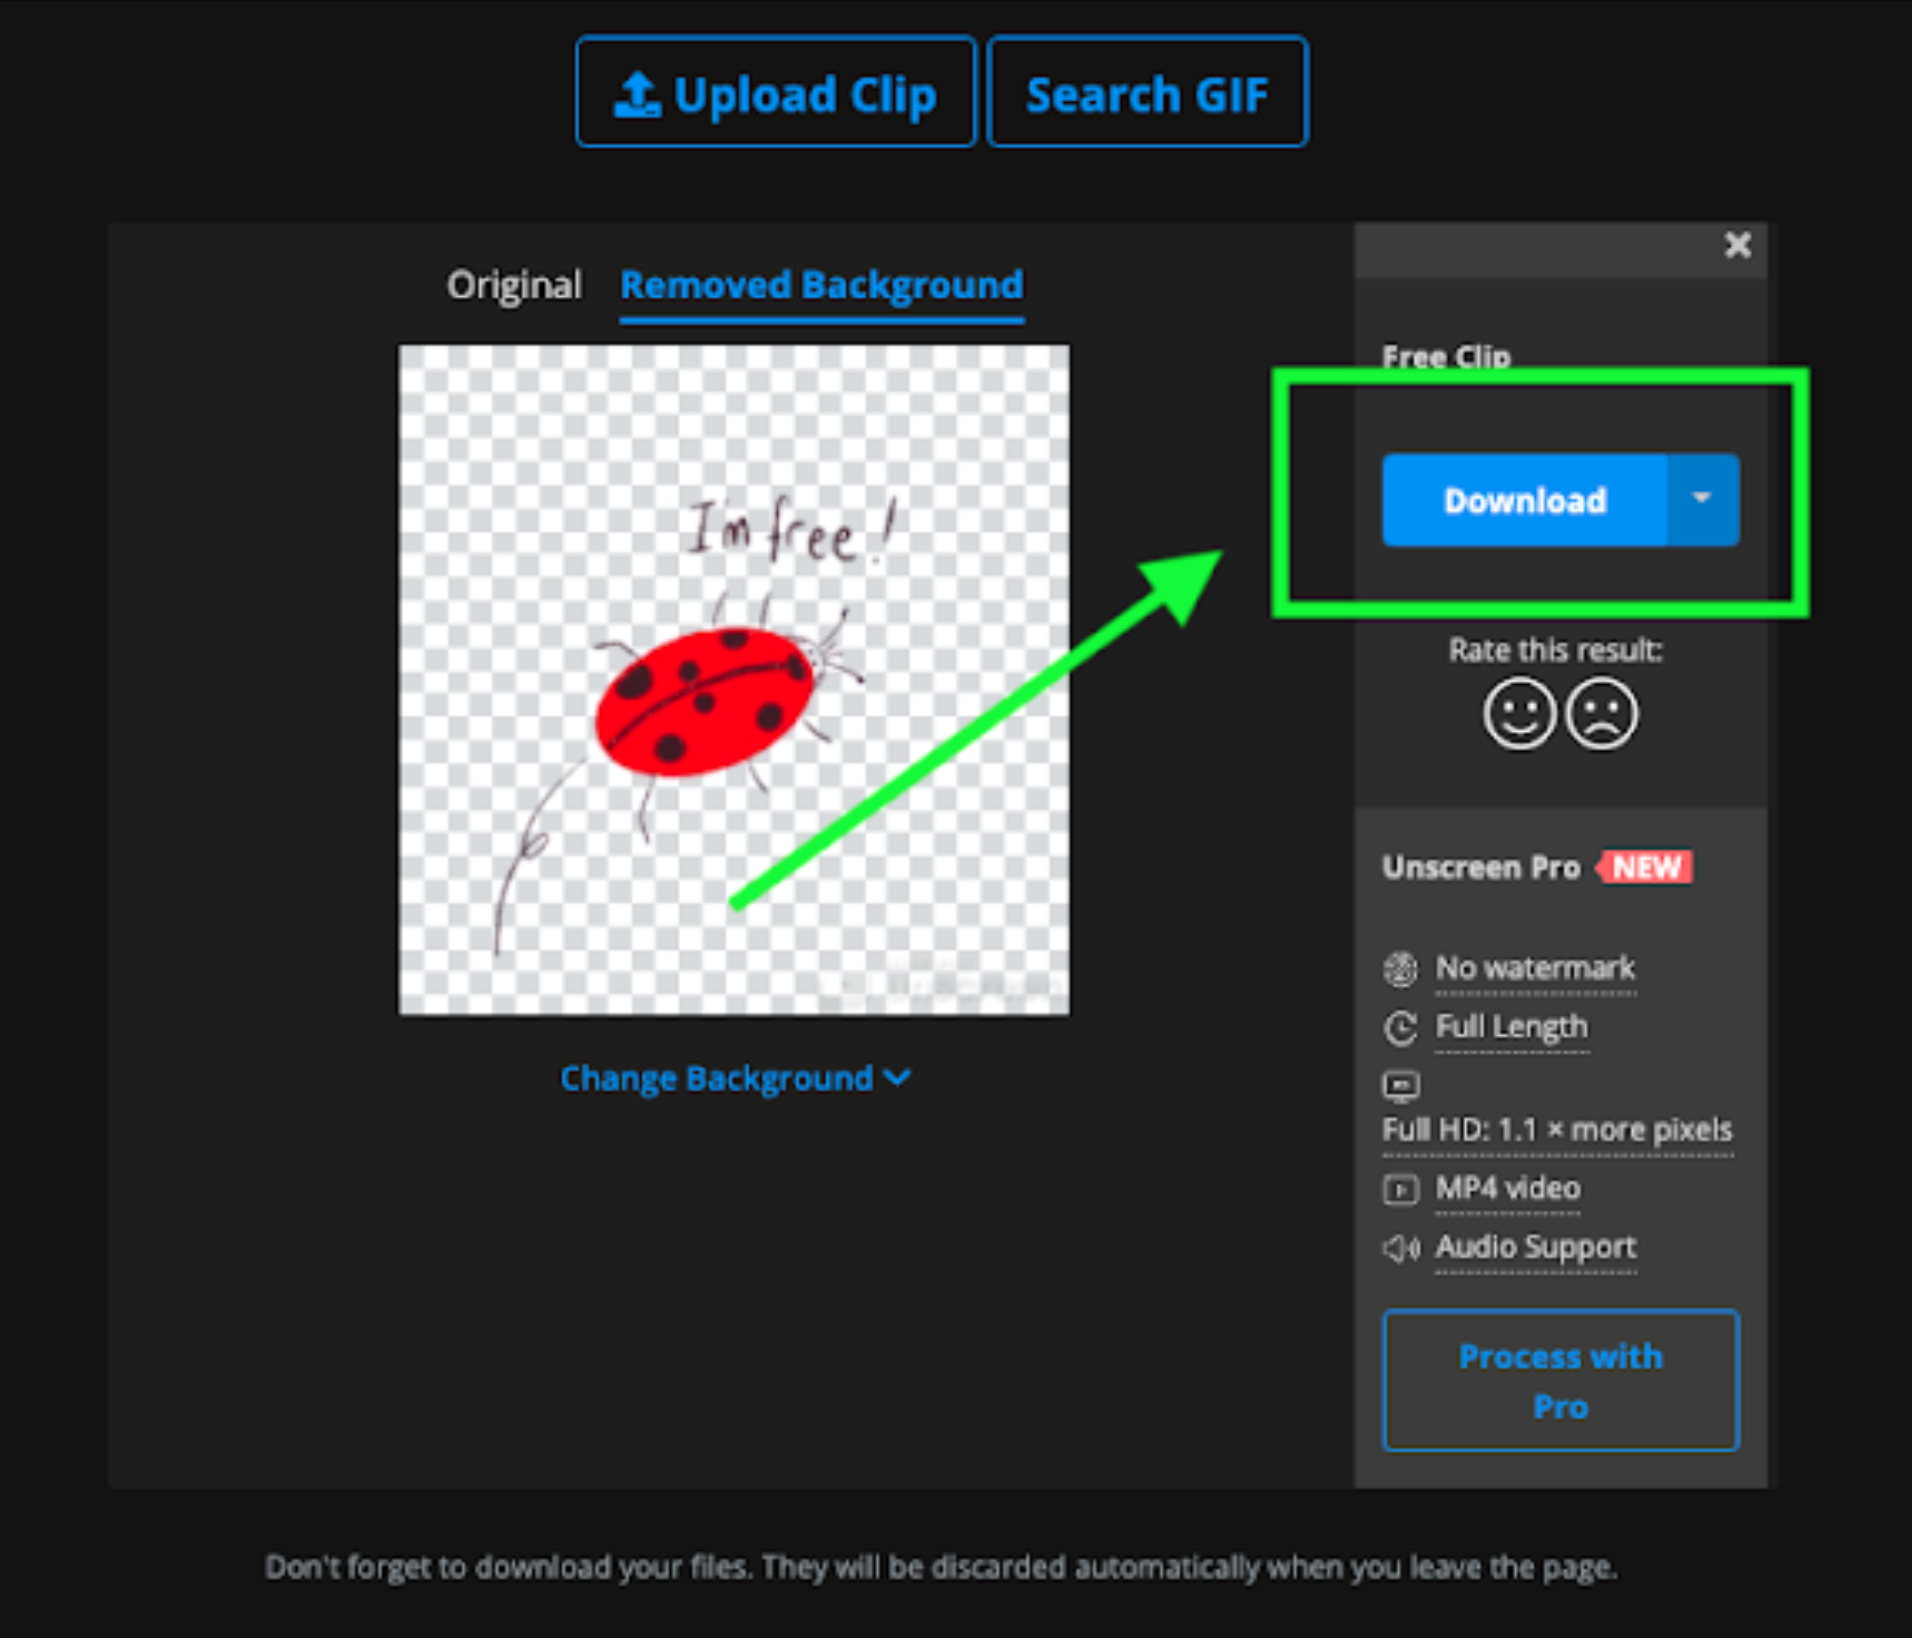
3. Within just a few seconds, the background of your GIF will be removed. Next, we’ll show you how to add another background — a color, video, or image. But if you’re happy with this and want to drop it into another tool, hit ‘Download’, and the GIF will save to your device.
How to change the background of your GIF
Once you’ve removed the background of your GIF, changing it to another one is just a couple of clicks away. In Unscreen, you simply:
1. Hit the button underneath the GIF labeled ‘Change Background.’
2. Now you can select ‘Video’ if you want the background of your GIF to be a video — this gives the GIF a very dynamic look and feel.
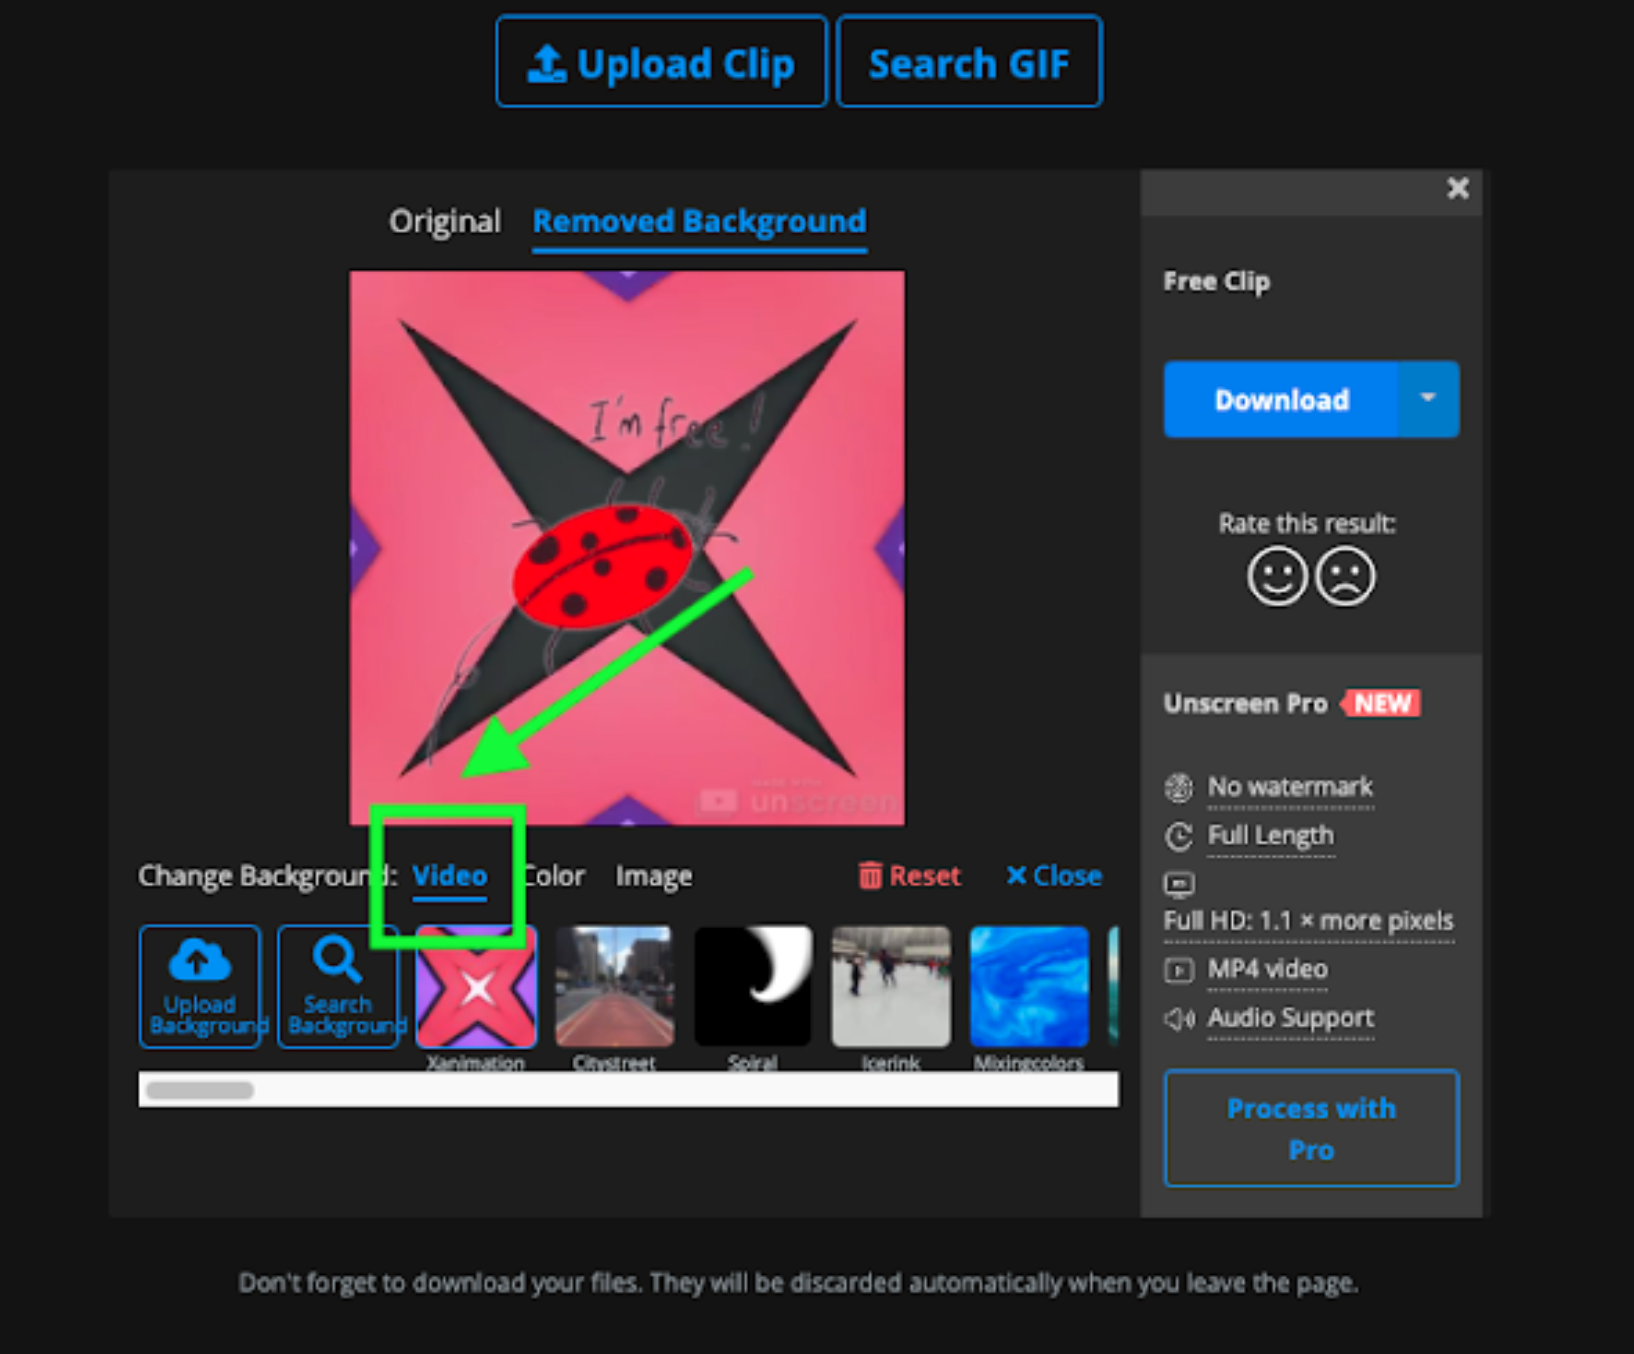
It will look something like this:

3. If you want just to change the background color, go ahead and hit the color tab.
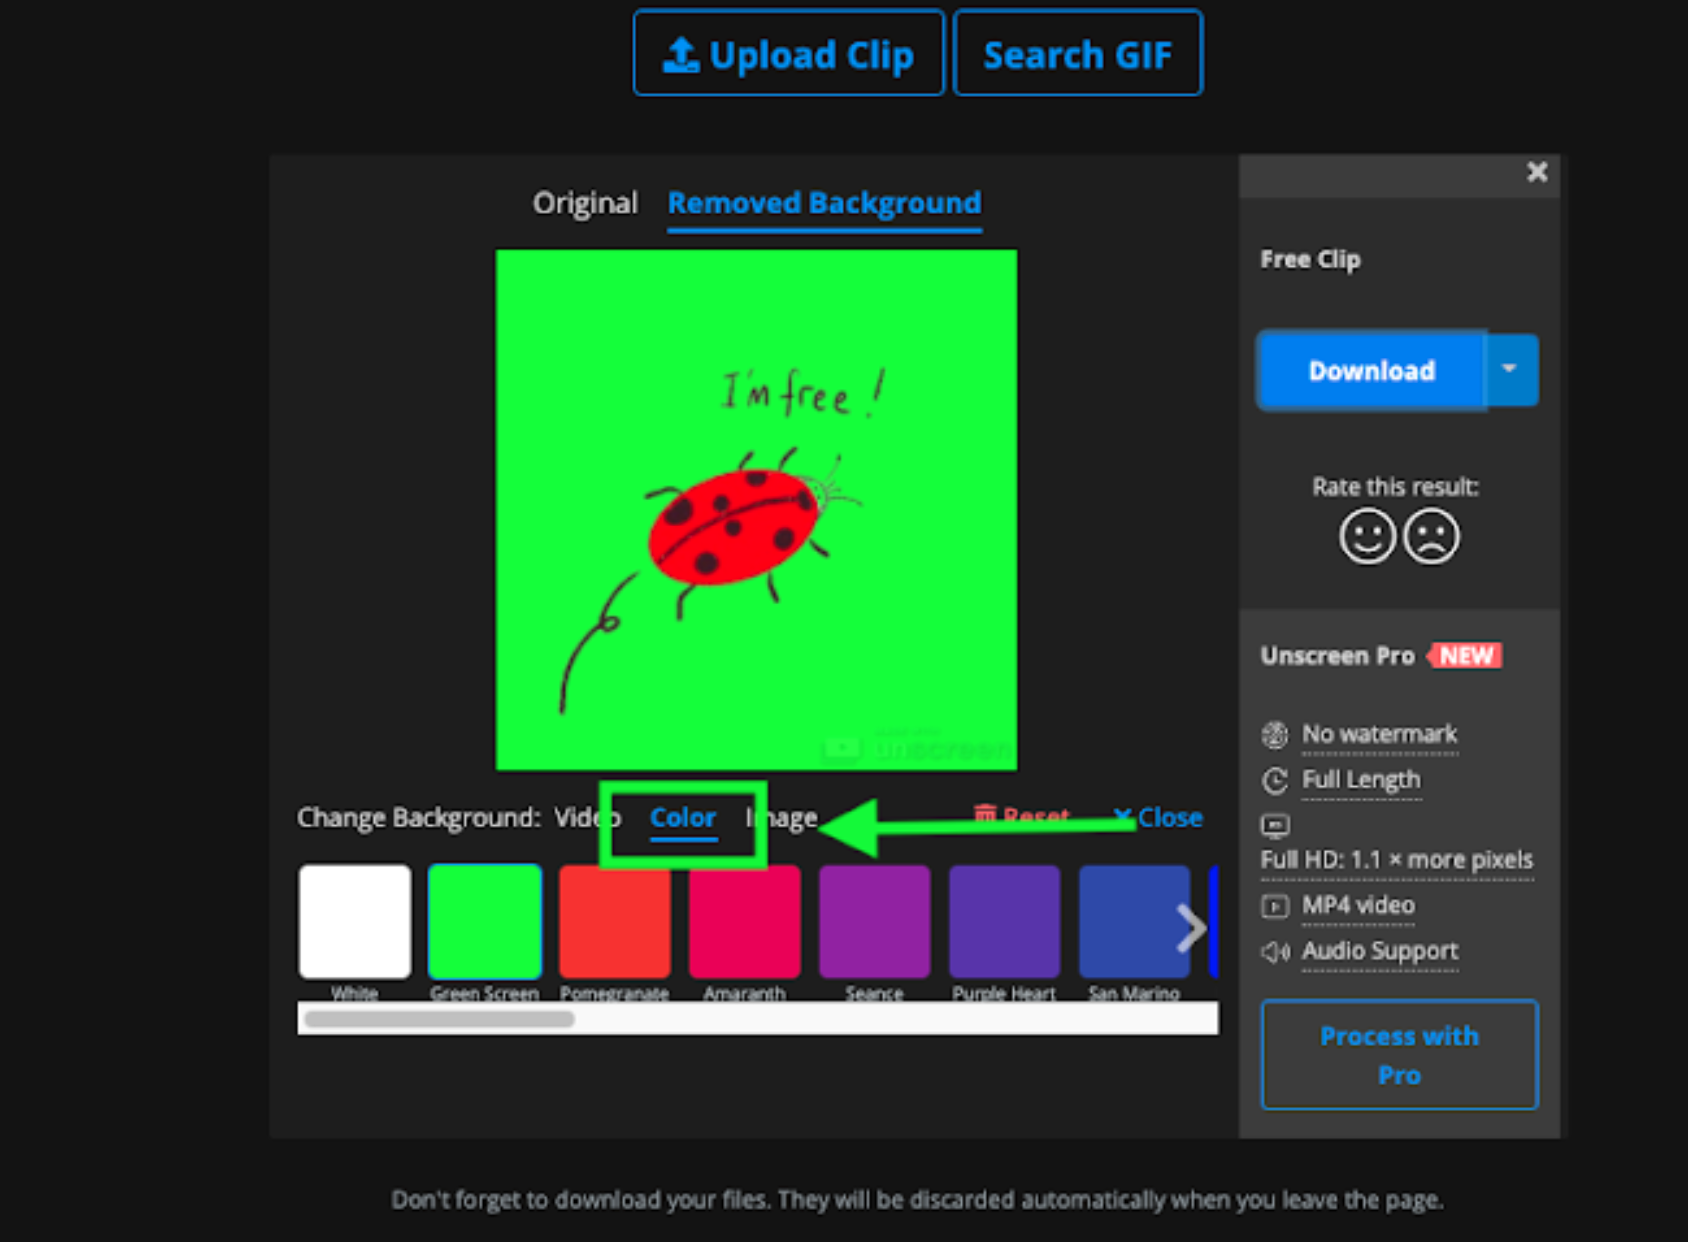
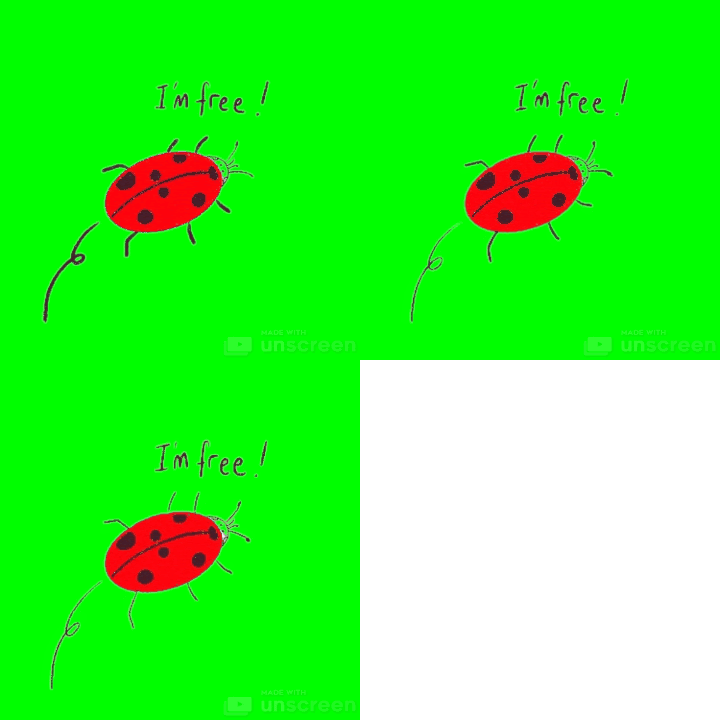
It could look something like this:
4. You can also add a photo as the background by selecting the Image tab.
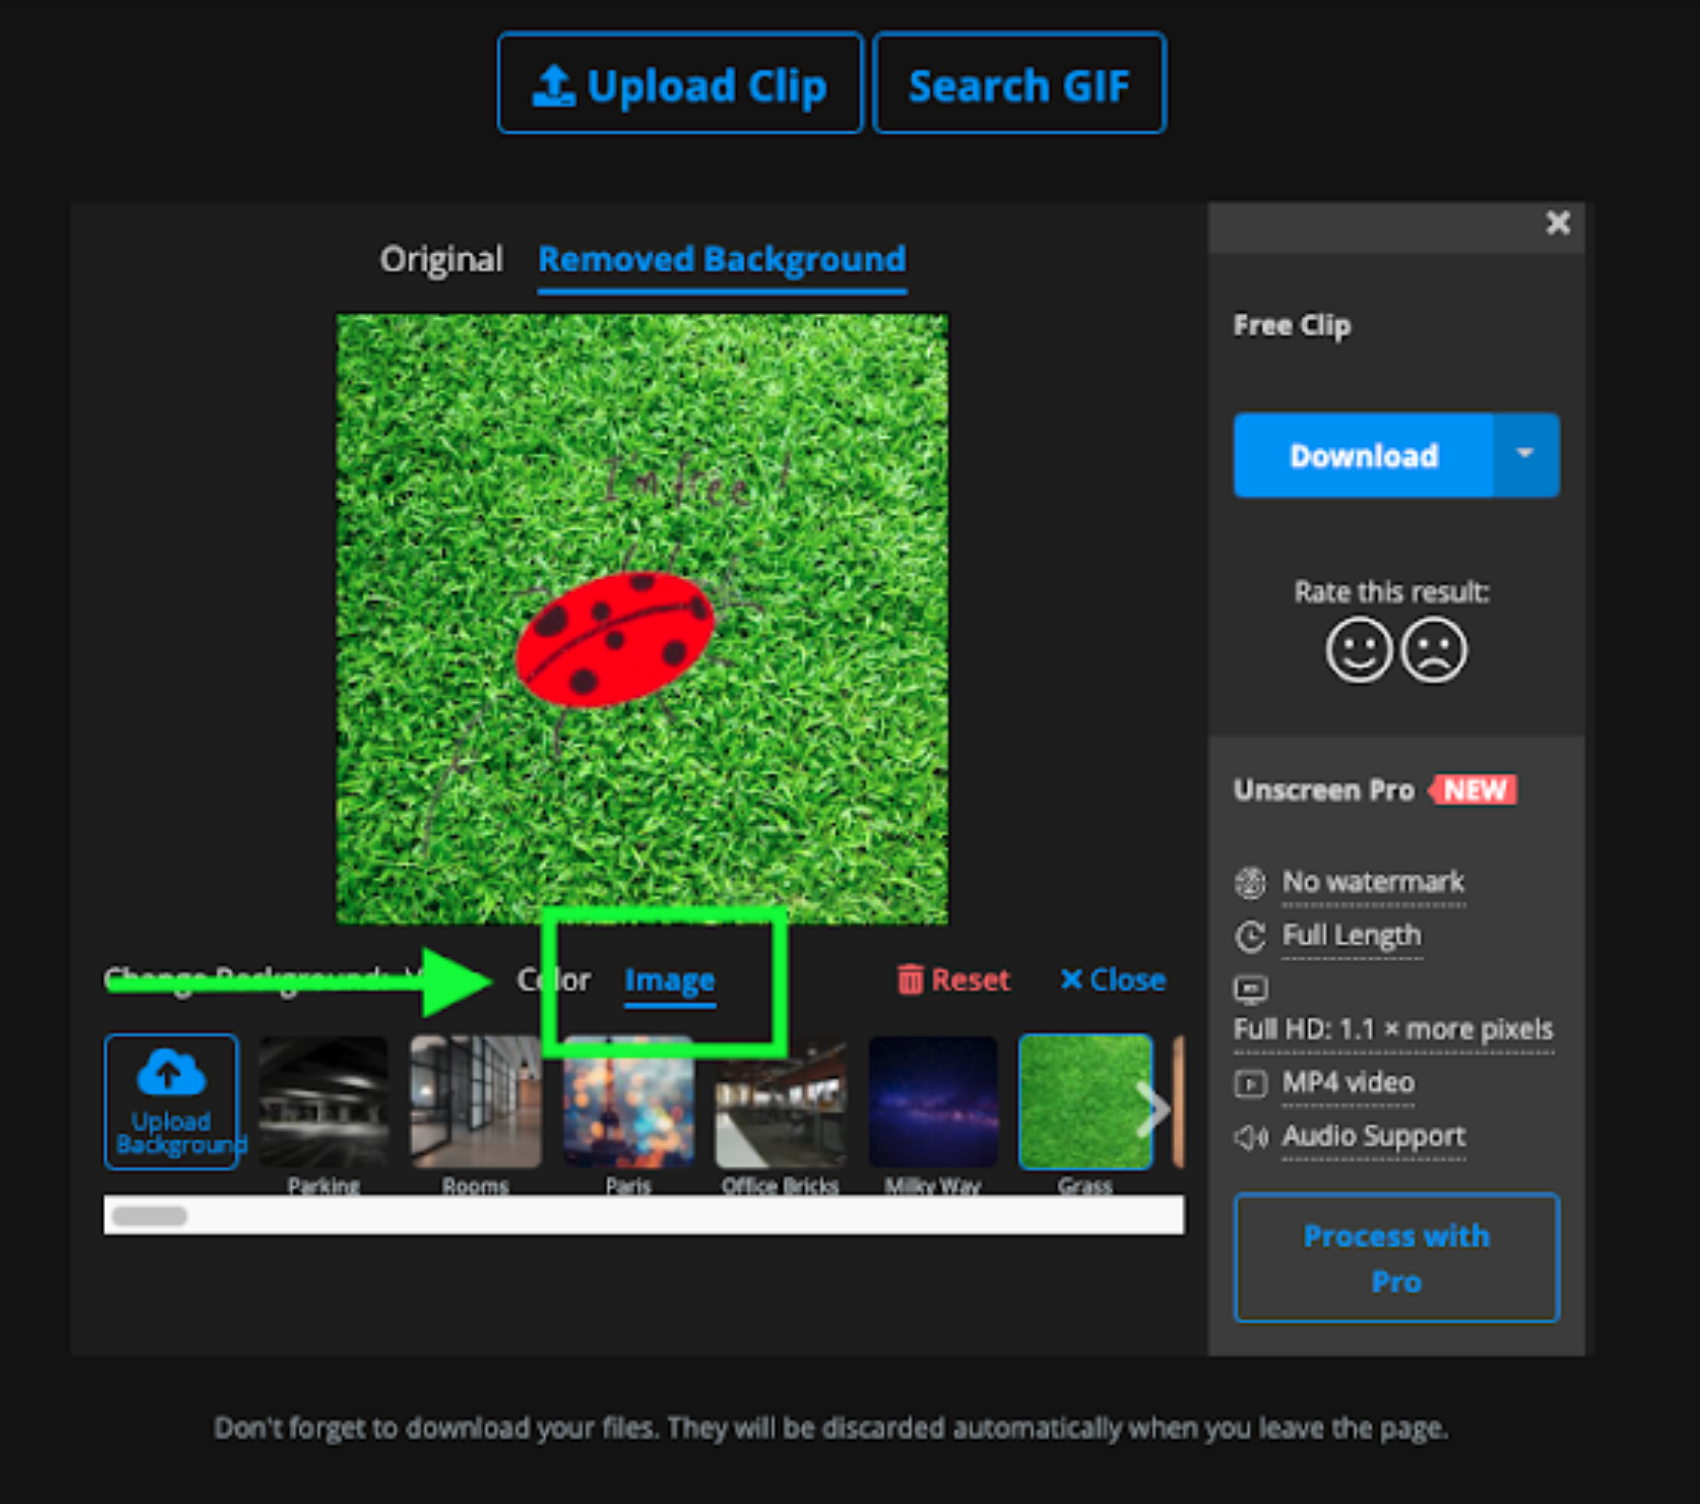
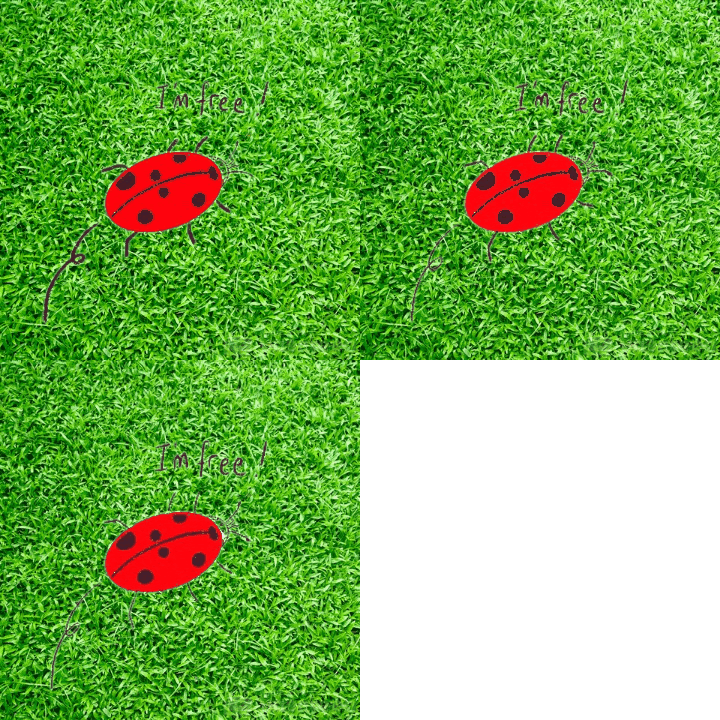
We went for the grass photo — seems fitting, right?
How to remove background from a GIF in After Effects
Although a bit more tricky, you can also remove the background of your GIF in After Effects.
First, go ahead and create a new composition.
Unless you have a green screen background, you will need to use the Roto Brush tool in After Effects.
Go ahead and upload your GIF or select a video from your computer by dragging and dropping it into the project on the left-hand side of After Effects.
Once it has been uploaded to After Effects, go ahead and draft it onto your timeline.
In the top left-hand toolbar in After Effects, go ahead and locate the ‘Roto Brush’ tool.
Then go ahead and double-click on the video and paint inside the object or person you want to keep in the GIF. Once you’re done painting along the insides of the object or person, release your mouse, and the edges will appear pink.
If you have any bleeds, you can press Option and paint on the areas you want to remove with the background. Once you’re done, you’ll see the pink outline has moved to indicate what parts will be kept.
Under the video, you’ll find a green bar. And underneath this, you’ll find another gray bar, which indicates what section of the video the Roto Brush will be applied to. Drag it to the right along the entire timeline to use the effect for the whole video.
Press space to save these changes; this might take a couple of minutes.
Now you’ll see your background of the video or GIF has been removed. To create a transparent background, select the > Toggle Transparency Grid; this will add a transparent background.
Now it’s time to export the video as a GIF. Go ahead and go to > File > Export > Add to Render Queue.
You will now see your render settings appear in the render queue. Go ahead and select > Render Settings > Best Settings. Then select > Output Module. Make sure your channel is set to > QuickTime. Channels need to be set to > RGB + Alpha. Depth should be > Millions of Colors +. Apply these settings and press > Save. Your video will now render.
Now you will need to go ahead and open up Photoshop.
Drag and drop the GIF.mov file you just exported from After Effects.
Once you’ve uploaded your video to Photoshop, go ahead and go to > File > Export > Save for Web (Legacy).
Select > Original in the tabs, change the preset to > GIF 126 Dithered. Make sure the Transparency box is selected.
Now press > Save.
You can also watch the full video tutorial right here:
If you want a more in depth guide, check out our post on how to remove video background in After Effects.
That’s it! We’ve just walked you through how to remove the background of a GIF online and in After Effects + Photoshop. Turns out it’s a little more complex, so if you fancy the quick fix, hop on over to Unscreen.
Comments
알아 볼수있으면 좋을것 같아요 그리고 프로그램 가격은 얼마 입니까
답변을 주세요
[email protected]
If you have any questions, feel free to reach out to us via [email protected].